
How it all started in 2009…

We are celebrating our 7th anniversary! As a thank you gift for the amazing 7 years, we would like to offer you a special 10% discount. Hurry up, the promotion lasts only until the end of this month.
We are celebrating our 7th anniversary! As a thank you gift for the amazing 7 years, we would like to offer you a special 10% discount. Hurry up, the promotion lasts only until the end of this month.
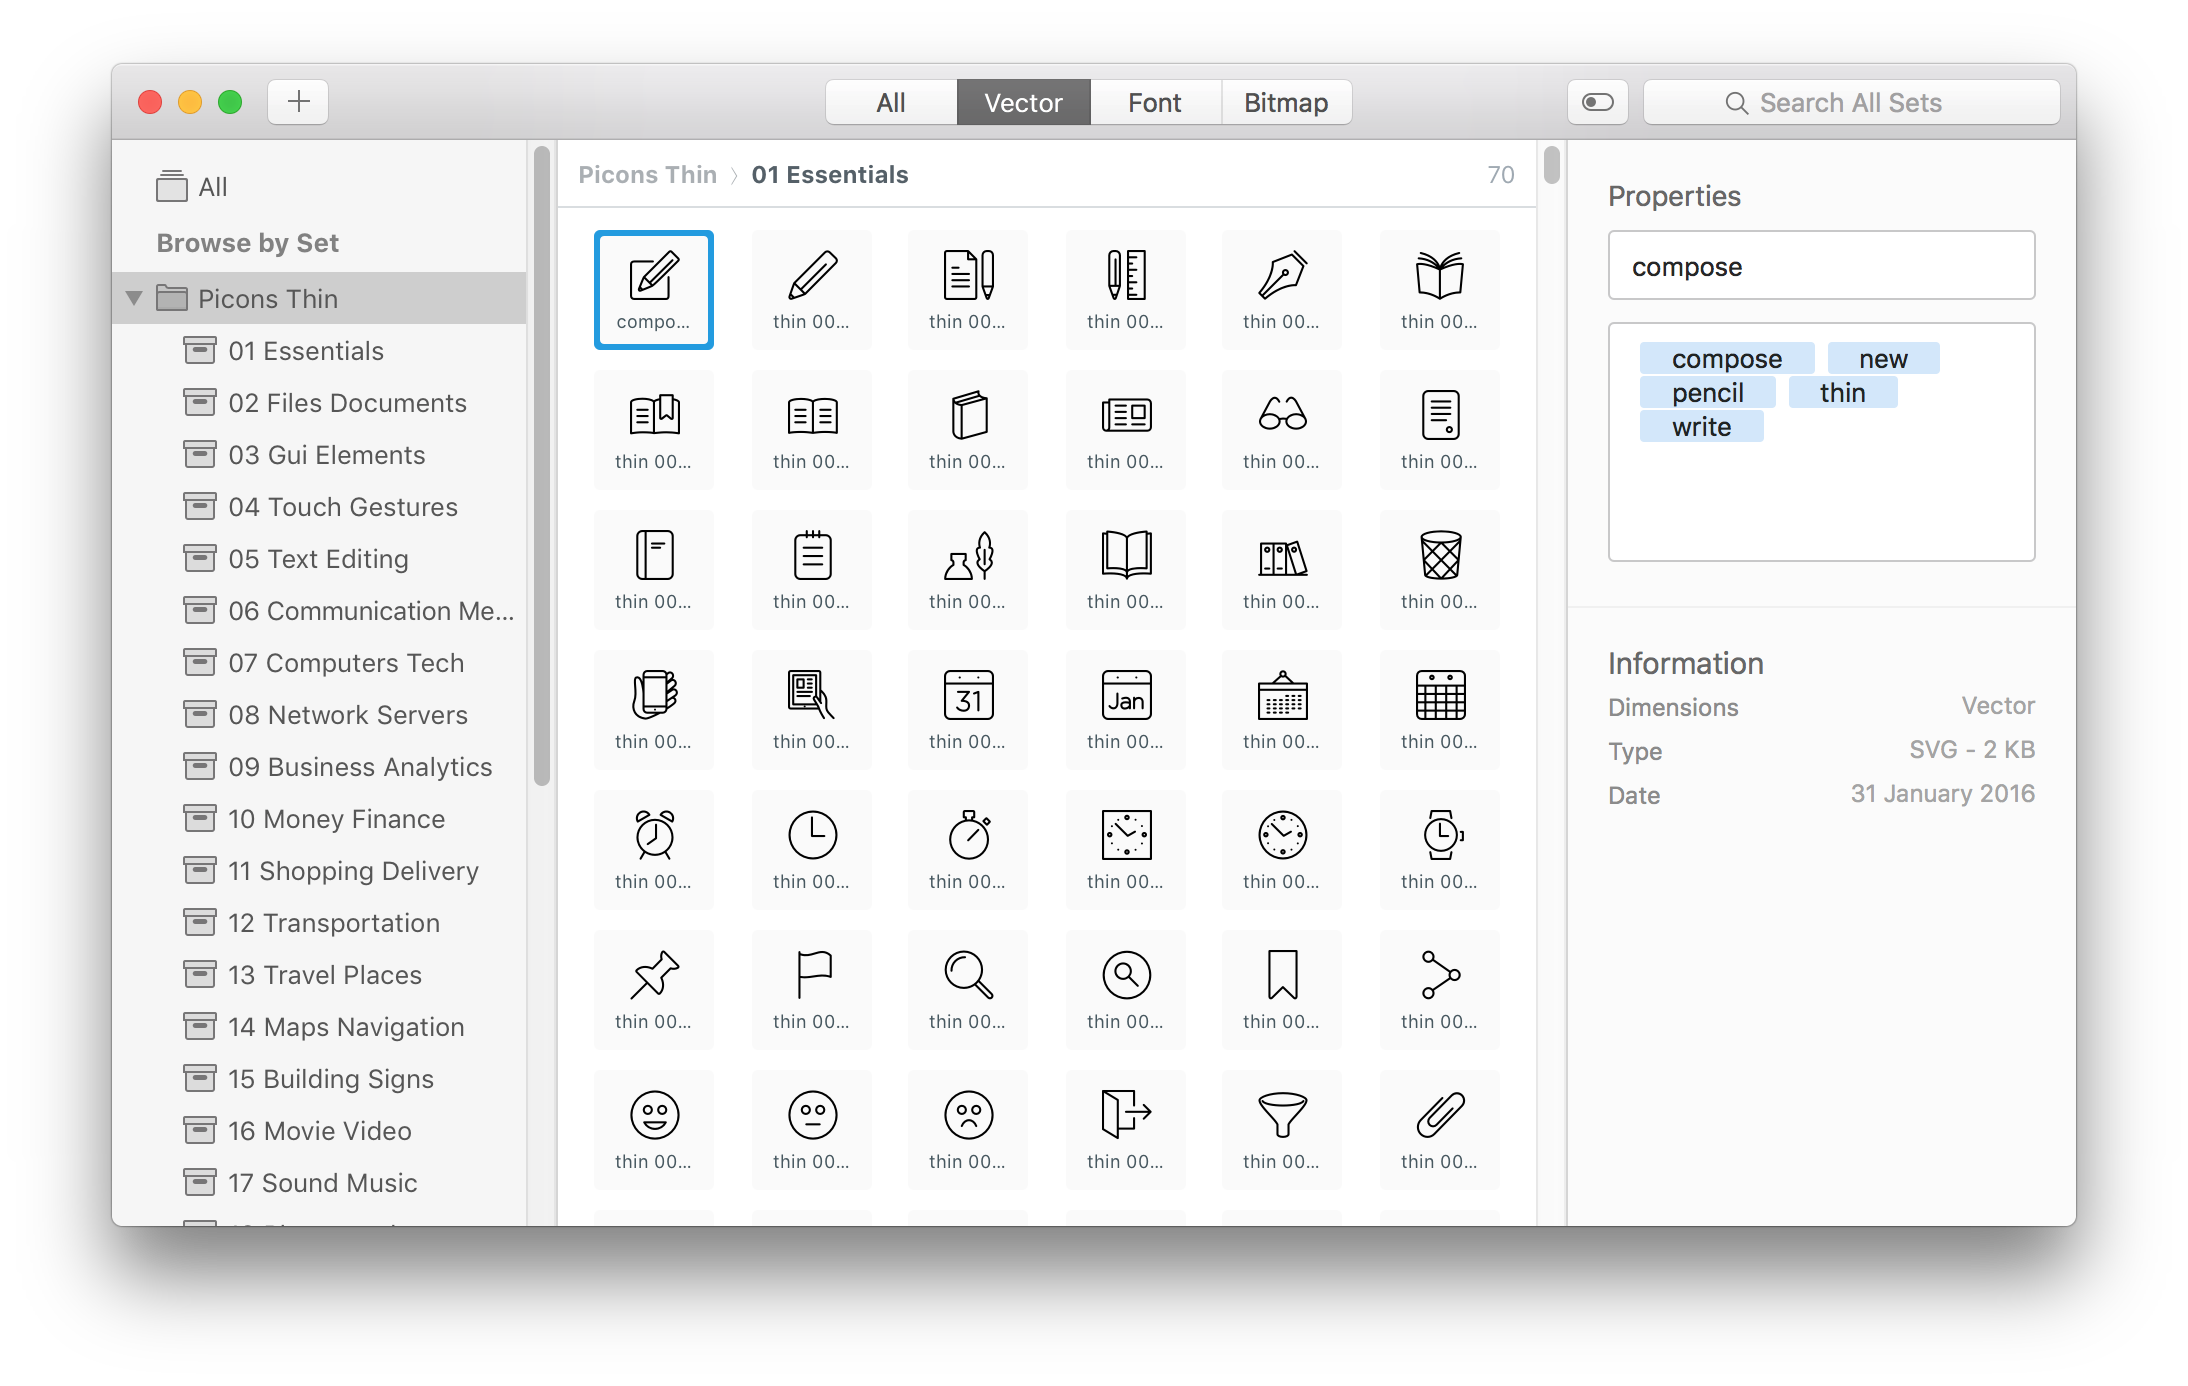
All our Picons icon collections already work with Iconjar. All you need to do is to import your Picons SVG files into Iconjar and then you can search for the icons based on keywords.
But Iconjar is not only a tool to easily search through all your icons, it also allows you to drag & drop any icon into the app you are working with.
For our biggest vector icon collection Picons Thin and BasiColor, we also added an .iconjar archive, with icons organized by categories, to even easily find your desired icon.
There has been many techniques to use vector icons on web sites. From importing bitmap image files (usually transparent PNG’s), to vectorized SVG’s or even using web fonts containing symbols instead of typical characters. All of those have advantages and disadvantages, so the choice is not always easy.
Even though, using non-standard fonts (in general) has became a standard of web development in the recent years. Displaying icons through fonts is the same as using non-standard fonts for titles and paragraphs. Times, where web designers could choose only from 5-10 different fonts, are – luckily – over.

Using icons as web fonts has many advantages:
Nonetheless, icon fonts have also disadvantages. The biggest I see is the unreliable rendering across browsers. The problem can be demonstrated with the following screenshot:
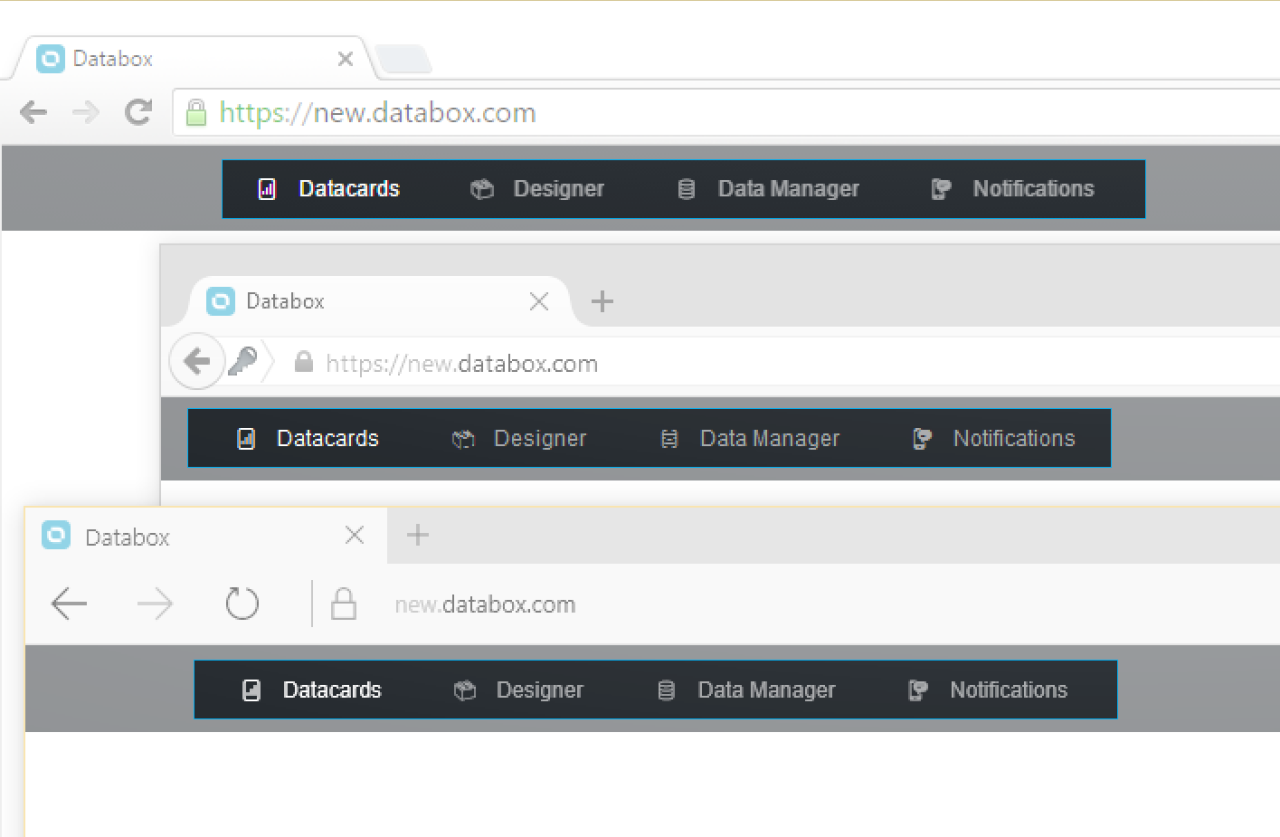
The other disadvantage, which is also related to inconsistent rendering, is positioning. It can be tricky to position a tiny icon into center of a circle, so it looks the same in every browser.
If you want to get more deep into this, you can find many articles with pros and cons of using icons as web fonts (Ian Feather’s Article, CSS tricks, SitePoint, etc.).
OK, enough of this. Let’s create an icon font and show how to use it on a website.
The first thing you need to do is to make your own personal selection of icons. It’s prefered you do that for every project individually, because including all of the icons, even if not used on a project, makes the font file larger. Carrying about loading times is still crucial for the mobile experience.
All Picons icon collections come with included SVG’s of each icon. But, we also have an own icon font with 130 selected icons, if you want to jump the step of creating your own.
There is variety of free and paid tools for creating own fonts. Specialized tools such as icomoon, Fontello, etc. are free and very easy to use. We will show the steps based on comoon’s app.
Step 1: Drag & drop selected SVG’s and create a new set
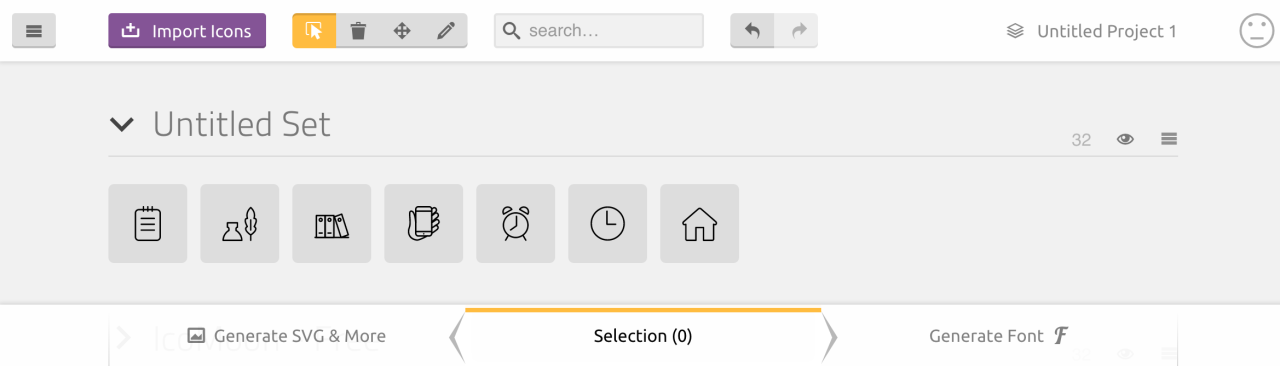
Step 2: Select all the icons you wish to include in an icon font (you can select them from various sets)

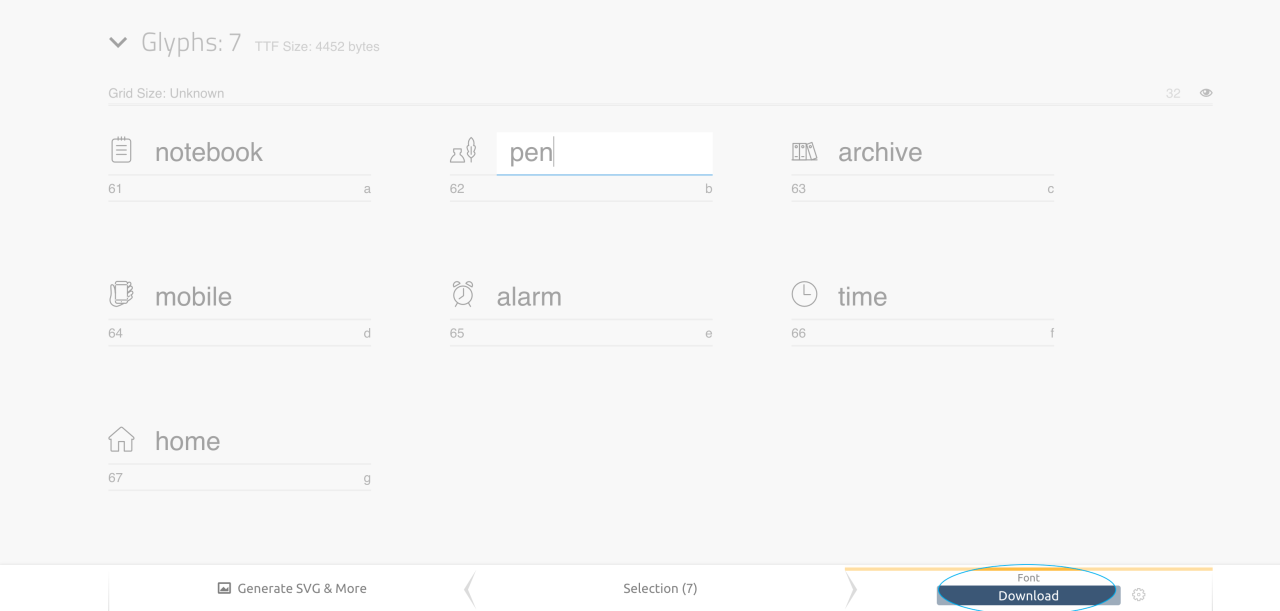
Step 3: Generate the Font

Step 4: Rename all the symbols as you wish and define a unicode character for each (optional)

Step 5: Download the generated file
Your generated icon font consists of various font formats (for cross-browser compatibility) and demo files including HTML and CSS.
Step 1: Copy the CSS code in the included “style.css” to your own CSS file
The included CSS file has a predefined class for each icon, telling your browser which character in the font to use for a specific symbol. You can also apply your own CSS styles to each icon (color, shading, etc…).
Step 2: Copy the folder “fonts” to your website folder
The folder “fonts” includes your generated icon font in different formats (woff, tff, svg, eot). Be sure that the uploaded fonts are linked from the imported CSS. If placed somewhere else than “fonts/”, then correct the link direction accordingly.
@font-face {
 font-family: ‘thin_custom’;
 src:    url('fonts/thin_custom.eot?hpwvww’);
 src:    url('fonts/thin_custom.eot?hpwvww#iefix’) format('embedded-opentype’),
 url('fonts/thin_custom.ttf?hpwvww’) format('truetype’),
 url('fonts/thin_custom.woff?hpwvww’) format('woff’),
 url('fonts/thin_custom.svg?hpwvww#thin_custom’) format('svg’);
 font-weight: normal;
 font-style: normal;
 }
Step 3: Insert the icons
An icon can be inserted with the following HTML code:
<span class=“icon-notebook”></span>
Where the class name “icon-notebook” is generated from the title you gave each icon when creating the icon font. The classes are referred to styling definitions in the included CSS file:
.icon-notebook:before {
 content: “61”;
}
The styling (size, color, hover, etc) can be applied inline (inside the HTML) or to your style.css.
Your feedback (including questions) is always welcome…
We updated our Picons Social icon collection: Google (updated), Google+ (updated), ebay (updated), Snapchat (added), Whatsapp (added), Edge (added), Outlook (added), Medium (updated), Google Play (added) and Apple iCloud (added).
Download it here for free.

After 7 years we finally took time to do a new website for our design studio. The previous site was revolutionary for that time and got multiple awards and mentions. But it was time for a change. The new site is very simple. It focuses on the design aspects that we do the most – product design & custom icons.
Have a look – http://morphix.si